Caveats
Only works on VMFS-type datastores. If your VMs are on NFS you have to Storage vMotion them to a VMFS datastore, vMotion itself may be able to thin the disk. Consolidate disks, delete all snapshots, consolidate again if necessary. Once you have decluttered your disks, proceed, otherwise I promise you will regret it. Shut down heavy disk-hitter VMs before doing this, not during (unless you unplug their virtual power cord AKA turn off). And avoid creating heavy network traffic during the process. It’s not that long, fortunately.
Prepare the VMs
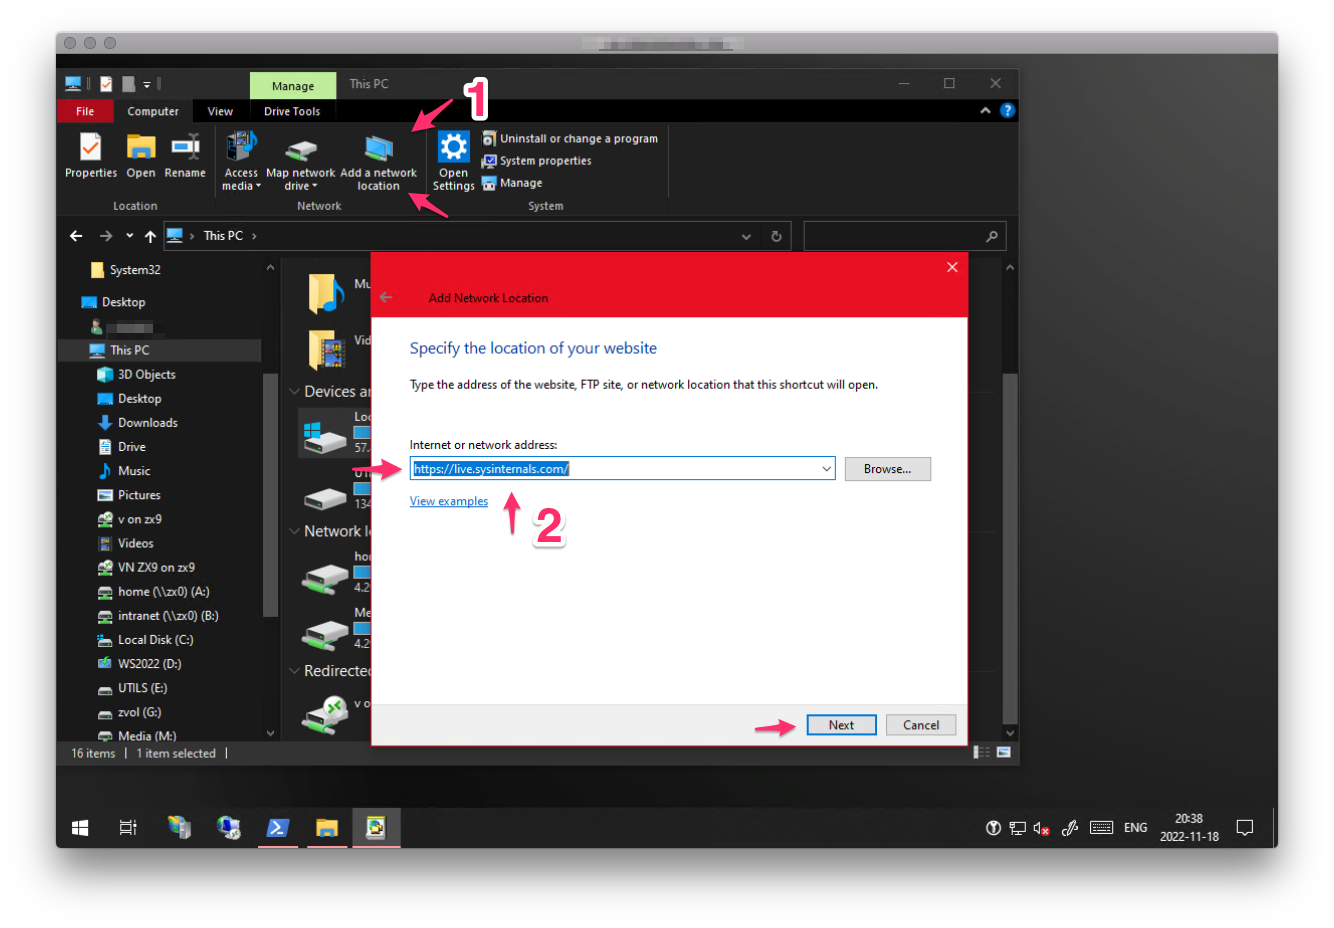
Get the SysInternals tools on Windows to zero out your disks.
On Windows you can do it without installation or even downloading anything, just mount their WebDAVS repo directly on file explorer, you’ll hav¨-´
e to open TCP:443 for the host live.sysinternals.com where you need to connect.
⇧-right-click on any free space among the files listed and select to open a PowerShell window. On older Windows it says a Command Prompt window if you haven’t change or doesn’t have the taskbar setting Replace Command Prompt with Windows PowerShell in the menu when I right-click the start button or press Windows key+X, ain’t that a mouthful.
Run for each local disk .\sdelete -z C:, replacing C: for the next in the list, of course.
On Linux it will vary by the million format options you have. VMware cites the example dd if=/dev/zero of=/mounted-volume/zeroes && rm -f /mounted-volume/zeroes. I’m not an expert so I’ll stay away from it.
What I will say is that personally I’d never try it on disk formats that double as volume managers, e.g; ZFS, Btrfs. Try other ways of rescuing whatever you need to rescue. Linux doesn’t treat you like a thief, collecting identifiers of whatever is identifiable to prevent you from moving your OS like Microsoft is with Windows–or you know… another less logical reason. It’s relatively trivial to rsync sensitive data and system files on Linux. Taking away the giant disk from the VM and mounting it alongside a new smaller disk on another Linux VM should let you cp/dd/rsync/etc the data.
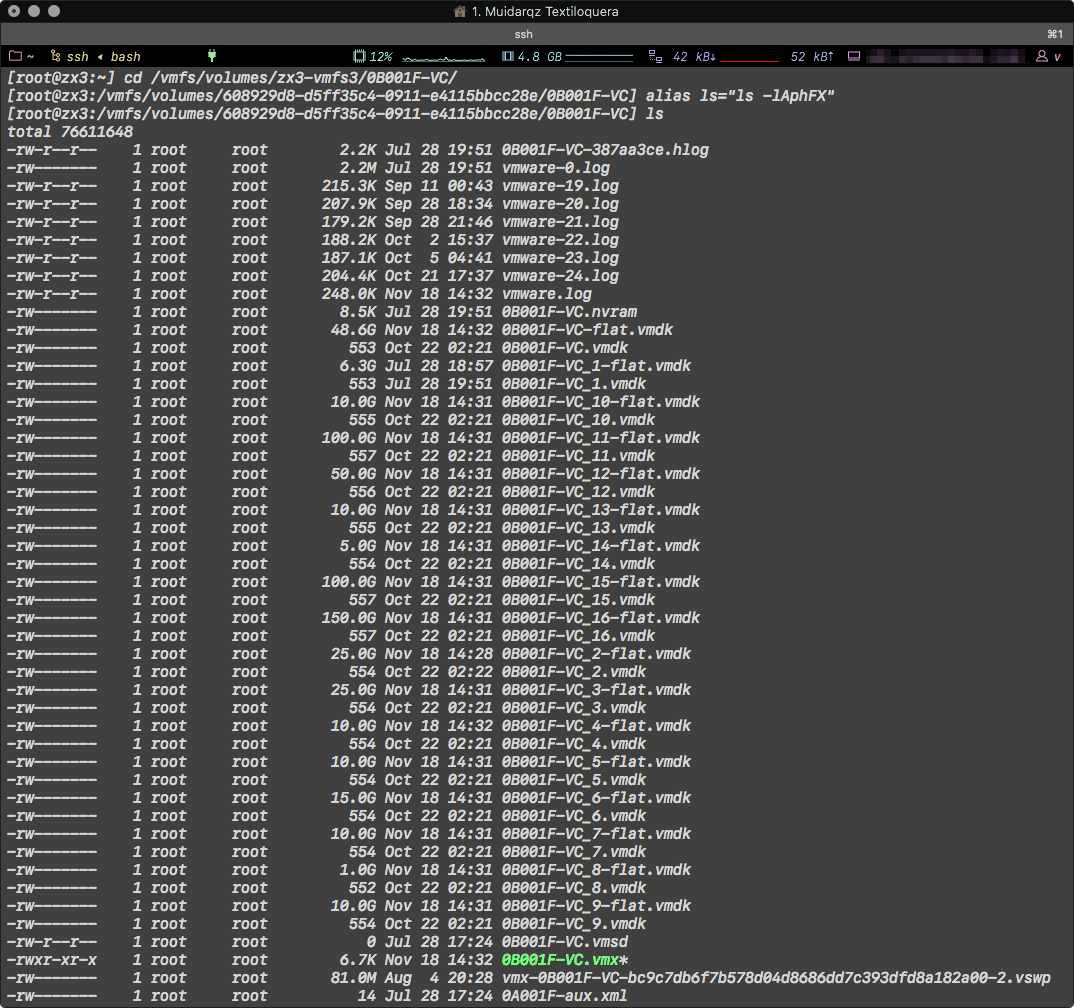
SSH or open you ESXi host’s console (on the yellow console press either ⌥F1 or ⌥F2 to show it) then navigate to your VM. Start by listing the contents of /vmfs/volumes/. Identify your datastore, and navigate to your VM’s directory. If you renamed the VM in the past without using Storage vMotion, it’s very likely to have its old name. vSAN data is completely different to what shown on vCenter, it’s best not to mess with vSAN directly, if you must insist, take the VM to a regular VMFS datastore using vCenter to queue the job.
Create a temporary ls alias to sort through things quicker, i.e; alias ls="ls -lAphFX".
As you can see above, there are a ton of files. You need to work on the non -flat.vmdk files only.
The final command you have to run is…wait ! I almost forgot: you must shutdown your VM, preferably properly, and unregister it from vSphere. You can do this on vCenter or ESXi, just watch out if vCenter doesn’t add it back.
The finally run the command vmkfstools -K disk_name.vmdk. In my case that would be vmdkfstools -K 0B001F-VC.vmdk. Now, for some reason vSphere is very unstable when I ssh in. You’ll never know if it’ll show a broken pipe-something error within minutes or within slightly more minutes. Speaking of…

So, I found a workaround for this: add before the same command, setsid, e.g; setsid vmdkfstools -K 0B001F-VC.vmdk. This executes the command on a separate process entirely instead of a child process from your SSH session, that will take down all child processes with it if it gets terminated. It also means that the command will exit immediately. Though occasionally it prints stuff on screen.
That’s it. You can exit your session now, grep ps‘s output to see if your task has finished. If you need to work on several disks, you can script it, for instance:
One of the following commands, the second, creates a script in-line in the directory where you execute it, it makes the script executable and it immediately runs it. The script finds all .vmdk-ending files excluding those ending in -flat.vmdk still using the current directory as the working directory and one at a time “punches out” the zeroed space in the disks.
The other script, the first one, does almost the same thing as the second explained except that in only prints out the files it would’ve used. Both command write out a script named thinner, meaning one overwrites the over.
The other difference is that the working one runs in the background
They need no adjustments, just copy and paste.
Testing script
cat << "_thinner" > thinner
#!/bin/sh
vdiskfindr() {
find . -type f -name '*.vmdk' -not -name '*-flat.vmdk' -exec echo {} \;
}
for vdisk in $(vdiskfindr); do
echo "$vdisk"
done
_thinner
chmod +x thinner
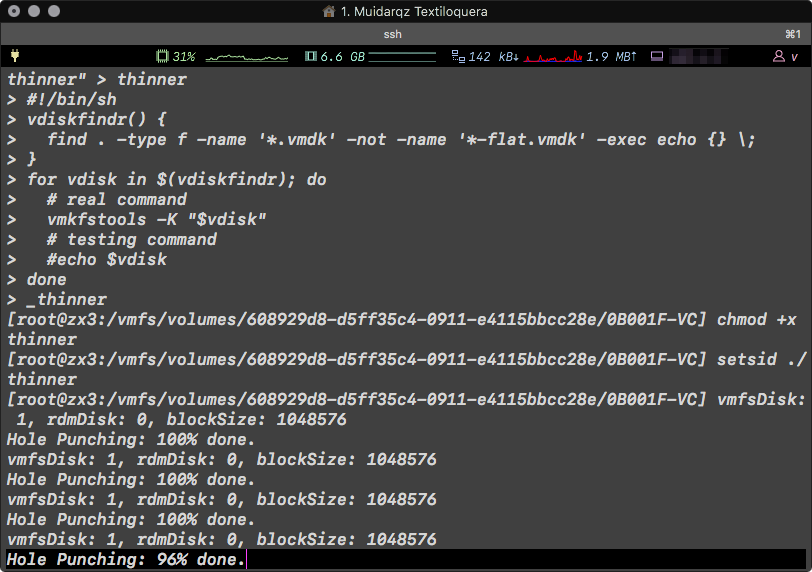
./thinnerJob-performing script
cat << "_thinner" > thinner
#!/bin/sh
vdiskfindr() {
  find . -type f -name '*.vmdk' -not -name '*-flat.vmdk' -exec echo {} \;
}
for vdisk in $(vdiskfindr); do
  vmksfstools -K "$vdisk"
done
_thinner
chmod +x thinner
setsid ./thinner
Take a little break, register your VM and power it on
As soon as it start running, I recommend you run ps | grep vmkfstools and study a little the output. The terminal might interrupt what your typing if the status changes, ignore it and continue as if I hadn’t happened, type in the command without looking at the screen if it’s confusing you to spell. Use only one finger, firmly pressing each key all the way down then releasing it quickly. I sound and looks stupid, but it helps specially when you’re sleep-deprived which is a very common theme when you’re troubleshooting.
Are you sleepy?
Maybe take a little disco nap, half an hour makes a huge difference in concentration, play some music, smoke some meth, I don’t know. Don’t let yourself get bored because it leads to data loss.
In regular Linux, this command would normally find itself in the list, but ESXi is weird. If you’re doing a batch of vdisks, the PID will keep changing, don’t worry about, all I wanted you to do it to learn to be able to tell the difference when the job is running and when it’s not.
And, that’s it. All you have to do is keep on checking from time to time.
It takes a while but not as much as zeroing out storage. Once it’s finished register again the VM, the quickest browsing the datastores on ESXi then after you find the VM’s location right-click the VMX file and select Register VM. This bypasses the whole assistant you’d get otherwise and your previous settings are preserved except for a few like automatic power on. You machine should be now available on the VMs view, powered off.
Hopefully this wasn’t too confusing. If you need help, don’t hesitate to ask. Just contact me however you can, I’m sure you’ll figure out how. I can’t write my addresses because of bots, sorry.
Leave a Reply